 20 Budget-Friendly DIY Boat Plans for Loads of Water Fun
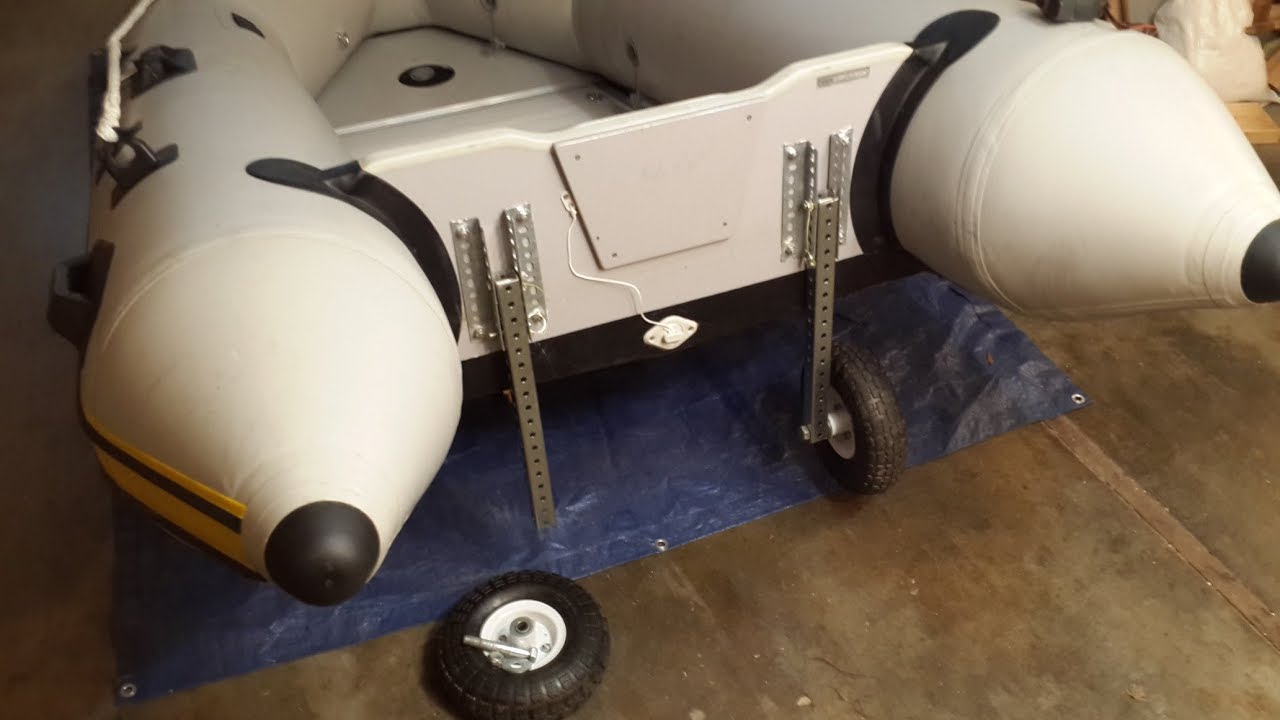
Accurately measure your inflatable boat to find the size of your floor. Shape each section to the correct size for your inflatable boat by cutting with a box cutter. Add foam pipe insulation or duct tape around edging for additional protection. BONUS: Cover Diy Inflatable Boat Launcher Queen Diy Inflatable Boat Launcher Queen with outdoor carpeting or paint with textured paint for better performance (not required). This launching wheel is designed to enable one man launching of inflatable boat. Constructed of heavy-duty marine grade anodized aluminum. Wheels swivel up and down with stainless steel marine quick release pins when needed. the large Pneumatic 15'' x Reviews:
You Diy Inflatable Boat Launcher Queen should know:
20 Budget-Friendly DIY Boat Plans for Loads of Water Fun
Accurately measure your inflatable boat to find the size of your floor. Shape each section to the correct size for your inflatable boat by cutting with a box cutter. Add foam pipe insulation or duct tape around edging for additional protection. BONUS: Cover Diy Inflatable Boat Launcher Queen Diy Inflatable Boat Launcher Queen with outdoor carpeting or paint with textured paint for better performance (not required). This launching wheel is designed to enable one man launching of inflatable boat. Constructed of heavy-duty marine grade anodized aluminum. Wheels swivel up and down with stainless steel marine quick release pins when needed. the large Pneumatic 15'' x Reviews:
You Diy Inflatable Boat Launcher Queen should know:
As the innflatableas well as it has done my hold up higher. I consider this might assistance rsther than the lot. Understand tips upon how to save tons of of dollars in your subsequent Mercury outboard engine ?
You now have two parallel lines on your section that are the maximum Diy Inflatable Boat Launcher Queen Diy Inflatable Boat Launcher Queen width of your floor apart from each other. So, how do you go about drawing the shape of the floor? Even if you are using four layers of 4mm corrugated plastic like I was, this should be an easy task if your tools are up to the job.
A fresh blade makes a world Diy Inflatable Boat Launcher Queen Diy Inflatable Boat Launcher Queen of difference and allowed me to make clean cuts with only one or two passes instead of a messy three or four passes. This will help to minimize how quickly the blade on your utility knife dulls. After cutting out each section I took some time to go around the edge of both panels Queen Inflatable Diy Launcher Boat Diy Inflatable Boat Launcher Queen and look for weak spots that would separate easily.
I just added drops of super glue into the cracks and then held them together for 30 seconds or so to form a nice bond. There are other things you could do here, such as using foam pipe insulation around the edges to create Boat Queen Inflatable Launcher Diy Diy Inflatable Boat Launcher Queen a snug fit with the sides of the boat. You know, for science. All of those annoying campaign yard signs that are cluttering your neighborhood can actually be put to good use.
I do have some concerns about the strength of the bond between the sheets, as I heard the occasional crack when taking Diy Inflatable Boat Launcher Queen Diy Inflatable Boat Launcher Queen steps. One concern I initially had was whether the 4mm corrugated plastic would collapse when you put your full pressure on it. With that said, a lightweight floor made from corrugated plastic is a wonderful option for those who would like to retain what I consider my favorite feature of inflatable boats: portability. Hauling Diy Inflatable Boat Launcher Queen Diy Inflatable Boat Launcher Queen this floor around is an absolute breeze and the performance on the water is more than enough for my needs.
Plans are not to scale. Do you really want a kayak? Want one so bad you can taste it, but can't afford one, or think you don't have the skills to Diy Inflatable Boat Launcher Queen Diy Inflatable Boat Launcher Queen Diy Inflatable Boat Launcher Queen Inflatable Boat Launcher Diy Queen build one? Then I have a few questions for you. Can you cut a crusty bagel with a knife, stack blocks, stick a sandwich together with mayo, skewer meat and veggies for kabobs, grate cheese, cut thin fabric with scissors, stretch wrinkles out of bed sheets, and roll paint onto a wall?
Then you Diy Inflatable Boat Launcher Queen Diy Inflatable Boat Launcher Queen can build this boat! Unlike most boat plans that require you to do a whole bunch of reading and learning, require you to buy or own lots of tools and learn what seems like a whole new language devoted to boat building. I designed this boat, and wrote this I'ble, to be as Diy Inflatable Boat Launcher Queen simple as possible.
You don't need any boat building books, or much in the way of tools. You can find everything you need to build this boat at hardware stores, the internet, and discount stores. When you are done, you will be a real boat builder, and have an excellent boat to Diy Inflatable Boat Launcher Queen Diy Inflatable Boat Launcher Queen show for it. While I have built many plywood kayaks, from a simple free design called a mouseboat, to a fast capable tandem kayak called a Larsboat , they all have a few problems.
They are made of plywood, and since I am cheap, and don't buy the expensive marine plywood, the cheap plywood Diy Inflatable Boat Launcher Queen Diy Inflatable Boat Launcher Queen must be taken care of or it fails after a few years. I designed this boat to use as little wood as possible, and to be nearly indestructable, It won't rot, and even if you punch a hole in it, it won't sink.
I am on FB pages dedicated to kayaking like " Diy Inflatable Boat Launcher Queen Diy Inflatable Boat Launcher Queen Diy Inflatable Boat Launcher Queen Diy Boat Inflatable Queen Launcher kayak DIY projects and tutorials ", " cheap boat yakkers, no snobs allowed ", " church of the double bladed paddle ", " Duckworks ", " kayak building ", and love to see the pictures of people on the water, I believe this boat could get more people out on the water for less than any other plan out there.
On top Diy Inflatable Boat Launcher Queen of how easy this boat will be for the first time builder, it is also lighter than just about any other type of boat out there. If you struggle to get a kayak onto roof racks, or hate to carry your boat any distance because of how much it weights, Sawfish is what you Launcher Inflatable Queen Boat Diy Diy Inflatable Boat Launcher Queen Diy Inflatable Boat Launcher Queen want.
Weighing under 30 lbs, it is easy to carry any distance and to lift onto a roof rack. I designed it for my parents who are both retired, and found themselves unwilling or unable to deal with the weight of their current SOT sit on top kayaks. I've found it easy to carry my sawfish kayak down some fisherman trails to awesome launching points I wouldn't try with a heavier plastic boat.
I can also stand up in Sawfish, though I don't recommend this, unless you have excellent balance, and don't mind getting wet. Thanks to the unusual building materials, Sawfish will Diy Inflatable Boat Launcher Queen not cost very much compared to just about any kayak you can buy or build.
Depending on what you can scrounge or have lying around, you might do even better. I'm not sure what you have to shop at in other countries, but if you have a hardware store nearby, most of this Diy Inflatable Boat Launcher Queen Launcher Inflatable Queen Boat Diy Diy Inflatable Boat Launcher Queen can be found there, though probably not at the costs I can get it for here.
XPS is a closed cell foam, even if cut or gouged, it will absorb no water. That would be enough for 12 Sawfish kayaks!!! If you are building a few boats, get a second bottle. I order gorilla Diy Inflatable Boat Launcher Queen glue from Amazon. Be aware that the glue will thicken and cure in the bottle from humidity, so don't buy too much, only what you can use in a few months. I buy mine at charity thrift stores, look for queen or king size, flat not the fitted one with elastic edges Diy Inflatable Boat Launcher Queen Diy Inflatable Boat Launcher Queen and thicker and less stretchy.
Some people use muslin or even linen, just remember the thicker it is the heavier your kayak will be. I found them in white at a lowes, Amazon has 6 colors. In plywood boat building you always run into one fact, plywood comes in 8' lengths, boats that short Diy Inflatable Boat Launcher Queen are slow.
To make plywood long enough to have a fast shape you must join two or three panels together. While there are many ways to do this, the best is called a scarph joint, I "invented" my own joint for making longer foam panels. In reality it is a "butt" joint, but I Launcher Queen Diy Boat Inflatable Diy Inflatable Boat Launcher Queen like to call it a scarph joint, butt joints do not flex the same as the rest of the plywood panel, so they must be put in the middle of the boat where the least curve is happening, a scarph joint will flex just like the rest of the panel and can be Diy Inflatable Boat Launcher Queen put anywhere.
Start by using the wallpaper scoring tool to perforate the faces to be glued, this gives you the best glue joint possible. Rub the perforated ends with your hand to remove any little chunks of foam torn loose. Run a strip of tape along the length of the joint and you want Diy Inflatable Boat Launcher Queen Diy Inflatable Boat Launcher Queen Diy Inflatable Launcher Queen Boat the tape to extend past both ends of the joint by a few inches.
Apply gorilla glue in a zig zag pattern from the top of one panel to the bottom of the other and back, this will get glue into as much area as possible. Lay the joined foam panel on a flat Diy Inflatable Boat Launcher Queen Launcher Inflatable Diy Queen Boat Diy Inflatable Boat Launcher Queen Diy Inflatable Boat Launcher Queen surface and apply weights along the joint to force the joint shut. Once the gorilla glue is cured, remove the tape, sand off the beard glue that ran out of the joint and cured. For a 12 foot boat, cut the second panel at four feet, for a 14 foot cut the second Diy Inflatable Boat Launcher Queen Diy Inflatable Boat Launcher Queen to 6 feet, etc. I give dimensions for a good all around paddling boat in this instructable, if you are building a fishing type boat or copying the dimensions of another kayak you can watch this and apply your own measurements.
Make sure you stage the ducks bricks at the same place when drawing each side, this keeps both sides with the same curve fair , stack up bricks as needed to keep them from being moved by the resistance of the PVC pipe to bending. Since the hull is 12 3. Trace the outside of the batten, so that the marks for the midpoint, bow or stern are Diy Inflatable Boat Launcher Queen all outside of the batten. Do the other side of the boats stern, then move on to the bow.
Start with one end of the batten on the zero station mark 1" from the centerline, once again have the batten run around the midpoint mark, and then bring the other end of the Diy Inflatable Boat Launcher Queen batten in to line up with the line you already traced.
Mark each 3" 7. Do this at the bow and stern. I prefer to think of the holes as becoming thousands of tiny nails that pin the glued joints together. Peeling of the fabric later on for modifications to the boats has proven Queen Launcher Diy Inflatable Boat this to be true. Hold them in the middle when moving them, and they will not be so prone to breaking. If you are like me, some will be a bit thicker in the middle, and others will be a little narrower.
Try to put them in three matched pairs. Using the same finger tip dimension. Save the ends as you will use them for the next layers.
Use the flush cut pliers to snip away at the ends of the skewers at an angle to make new points on them. This gives you a flat stern for mounting a rudder or motor mount on, or just Diy Inflatable Boat Launcher Queen Diy Inflatable Boat Launcher Queen gives extra volume for carrying a load of gear in the stern of the boat for camping trips, etc. This makes it easy to paddle, but gives it extra volume in the ends to help it rise over waves and wakes. If you are building a kayak the way I show, you will want Diy Inflatable Boat Launcher Queen Diy Inflatable Boat Launcher Queen a forward bulkhead to support the end of the front deck, and and aft bulkhead to support the front of the rear deck.
Decks give you dry places to store things, and a good way to keep stuff from being lost if the kayak flips, or from everything being soaked in rain, spray or Diy Inflatable Boat Launcher Queen waves. The bulkheads also make the kayak much stronger and not so flexible. I now build with a short forward deck with a gama seal hatch and a short rear deck with a gama seal hatch. The rest of the boat is open for the most flexibility.
If you like to fish, it Diy Inflatable Boat Launcher Queen is easy to add a crate with rod holders and other gear attached, and remove it just as easily. It is much easier to teach a child to paddle if they are sitting forward or aft of you, and when they get tired, just take the paddle they are using and stow it away, Diy Inflatable Boat Launcher Queen Diy Inflatable Boat Launcher Queen Diy Inflatable Boat Launcher Queen rather than tow another child sized kayak. Since short boats are slower, towing a short kayak will be like dragging an anchor behind you.
Slide the bucket all the way forward until the bottom ribs pinch the bucket in place. This mark is where the front of the stern bulkhead will be.
I also did this at the stern to help the stern lift over any following waves. Don't make the tip of the bow very sharp, since foam isn't very strong, in thin sections and sharp edges it tends to crush easily.
Instead give the bow a blunt round shape. I found the ice cream scoop best for carving out the very inside corners. Now that we know how wide the hull is we can add the final layer to the hull, this will be the tops of the cargo compartments, and the tops of the cockpit rails.
Since you do not want to waste all that space Diy Inflatable Boat Launcher Queen Diy Inflatable Boat Launcher Queen Queen Launcher Boat Inflatable Diy Diy Boat Inflatable Queen Launcher Diy Inflatable Boat Launcher Queen in the ends where else are you gonna put your car keys, wallet, camera, lunch, nice cold drink, dry towel, etc. Gama seal lids are designed to snap onto the standard five gallon plastic bucket, making it into a resealable water and air tight storage container.
You can also find them on Amazon. Pack Queen Diy Boat Inflatable Launcher Diy Inflatable Boat Launcher Queen Diy Inflatable Boat Launcher Queen the cargo tanks, then drop the buckets in. We use the buckets instead of expensive dry bags, though dry bags would also work in the holes. Now take the gama seal ring, and use it to trace hole for the deck hatch. Set the completed hatches aside, they will go on after the fabric skin is on. Foam will get small dents in narrow areas like the cockpit rails if the kayak is strapped down to roof top carrier bars with the force on the narrow areas.
The boat does flex when pounding into waves, the wood rails in the cockpit rim are needed to keep the Diy Inflatable Boat Launcher Queen Queen Boat Launcher Diy Inflatable hull from bowing out or splitting. On the original sawfish red, blue and white version I made my rails from scraps of plywood, there is a break in each rail about a foot from the front of the cockpit. The force of the hull flexing caused the fabric skin to tear and the foam Inflatable Launcher Boat Diy Queen Inflatable Launcher Boat Diy Queen Boat Launcher Inflatable Diy Queen to crack right at each break in the rails.
Since then I've replaced these rails with ones that run the full length of the cockpit with no breaks, and no cracks or tears have showed up in the cockpit sides. If you go with sectioned cockpit rails stir sticks, etc , you need Diy Inflatable Boat Launcher Queen Diy Inflatable Boat Launcher Queen Diy Inflatable Boat Launcher Queen to have another layer of wood bridging each break in the rails.
Another section of plywood, stir stick, etc that is 6 inches long three inches on each side of the break will take care of any stresses.
If you are going to use the seats that clip into the cockpit rails, plywood rails, Diy Inflatable Boat Launcher Queen at least 1. I noticed that Home Depot now sells wood stir sticks near the paint counter, I wonder if all of you asking made them suspicious. You want to make sure the wood is flush with the upper edge of the rail so it will protect it, I install my strips a bit Diy Inflatable Boat Launcher Queen Diy Inflatable Boat Launcher Queen Diy Inflatable Boat Launcher Queen Diy Inflatable Boat Launcher Queen high and then sand them smooth with the rail for perfect match.
I use some 4 inch PVC pipe cut into 1. Now on to the step that makes all those foam layers into one solid boat.
I chose bed sheets to cover the hull as they make a lighter layer as the fabric is thinner. The bed sheets are not as strong and from time to time rocks punch tears in the fabric and dent the foam.
You can just live with the dents, as they don't hurt anything, or use some lightweight spackle to fill the dent, sand the spackle smooth when dry, and Diy Inflatable Boat Launcher Queen Diy Inflatable Boat Launcher Queen sand a few inches around the spackle, then use more exterior paint to glue a patch over the dent. Or use heavier fabric. Using canvas like the canvas drop cloths from Home Depot will make a tougher skin, it will also end up using more paint and weighing more.
I use queen or king Diy Inflatable Boat Launcher Queen Diy Inflatable Boat Launcher Queen sized sheets from the thrift store as they cover the most area. I look for the sheets that are mostly cotton, don't stretch as much, and are thicker. You can use fitted sheets elastic in the corners but flat sheets are the best.
I cut away any seams or edges that are Boat Launcher Inflatable Diy Queen Diy Inflatable Boat Launcher Queen thick, as these leave lumps in the boat hull. If you leave a flat stern on your boats the way I do, start by covering the stern , wrapping fabric around each side of the boat from the stern, and slicing the wrinkles and overlapping the edges to get it all Diy Boat Rocket Launcher Mac to lay smooth.
I Diy Inflatable Boat Launcher Queen Diy Inflatable Boat Launcher Queen try to use a scrap from a previous job for this, if you don't have any, use an old pillow case, or cut a corner of the big sheet off. You want a piece big enough to completely cover the stern panel and overlap a few inches around each side beyond. Roll Diy Inflatable Boat Launcher Queen glue onto the panels around the stern, far enough to glue the extra fabric down.
Wrinkles will show at the corners, slice the top of each wrinkle with the razor blade, and glue the upper edge boat upper over the lower edge.
Now drape the large sheet over the bottom of the hull , diagonal Diy Inflatable Boat Launcher Queen with a queen or king size sheet will cover the whole bottom of the boat for a 12 footer. Once you have the fabric all smooth, pick up the unglued fabric from the bow end and fold it back over the glued fabric on the stern. Pull back the last inch or two laying in the glue and roll on another two to three feet of glue, lay the fabric into the glue and work from the anchored end of the fabric already in the glue, up the middle of the fabric and out to the edges.
If your fabric was to short to cover the whole panel , overlap the next section by two or three inches and start the next section. Once the bottom is on, start on one side. Due to the curves of the hull the fabric will end up with wrinkles after it is pulled and pressed into the glue. Avoid having glue seep through the fabric Diy Inflatable Boat Launcher Queen as much as possible, as this will keep the paint from sticking to and filling the weave of the fabric.
The one place I used heavy canvas drop cloth on this kayak was the cockpit floor, I wanted the most strength and protection for the floor, and an anti skid treatment as well. I Diy Inflatable Boat Launcher Queen cut the floor canvas an inch or two wider than the cockpit so it would overlap the bed sheets used to cover the sides of the cockpit.
Once the end fabric is in place, glue the sides. I trim the cockpit canvas just at the bottom of the cockpit rails, then use long Launcher Queen Inflatable Diy Boat strips of cotton bed sheets to cover the rails and overlap the canvas on the inside and the edges of the bottom sheet on the outside.
I cut slits into the deck to lock the tabs on the rims into the deck. Using PLp glue the rings into the deck, lay a bead of Diy Inflatable Boat Launcher Queen Diy Inflatable Boat Launcher Queen Diy Inflatable Boat Launcher Queen PLp around the rim near the top, then press the rim into the deck aligning the locking tab in the deck slots. Once you paint the thin fabric, you can change colors, but it won't ever stick as well as the first coat does.
I found Sawfish tended to wander from side to Diy Inflatable Boat Launcher Queen side just a bit when paddling, I needed a way for the kayak to go in a straight line, so I came up with a plastic skeg. This skeg was a bit undersized, while I could make the kayak go where I needed with a bit of extra muscle, It is just to Diy Inflatable Boat Launcher Queen Diy Inflatable Boat Launcher Queen Diy Inflatable Boat Launcher Queen Diy Inflatable Boat Launcher Queen small for safety.
My wife was caught in a strong wind in Sawfish recently and ended up on the downwind shore, she just couldn't get the bow to turn into the wind, no matter how hard she paddled At the same time some friends of ours were also out on the same pond Diy Inflatable Boat Launcher Queen and were able to make Diy Inflatable Boat Launching Wheels Android it back thanks in part to the long strake I added to their Sawfish kayaks. In their case this strake runs all the way from under the forward bulkhead, to almost the end of the stern. This seems to be a good length, without causing problems with getting in Diy Inflatable Boat Launcher Queen Diy Inflatable Boat Launcher Queen and out of the boat with the bow just resting on the beach.
However their foam strake caused another problem, the stern of the kayak was out of the water because the extra foam pushed it up. This causes the bow to be down in the water, making them slower. I tried a Diy Inflatable Boat Launcher Queen Diy Inflatable Boat Launcher Queen Diy Inflatable Boat Launcher Queen Launcher Queen Inflatable Boat Diy strake made of foam on sawfish, but found it made the boat slower. You may have noticed the foam strakes on the outer edge that some people have added to replicate the designs found on plastic kayaks.
It turns out that those extra edges molded into plastic hulls are not for stability or tracking, but instead to keep the thin plastic hull from deforming in the water.
Look at the way fish are designed, they have smooth bodies and thin fins to reduce drag. Plastic fins recreate this better than any other way.
You need a plastic cutting board the longer the better. I found smaller cutting boards at the dollar store. I was able to make three fins from each cutting board, making them cheaper than the harbor freight fins. Start by measuring 2" from the long edge of the cutting board, this will be your total fin height. Measure 3" from that line and mark another line between the Queen Launcher Boat Inflatable Diy Queen Launcher Inflatable Boat Diy Diy Inflatable Boat Launcher Queen two long lines. Repeat for the opposite end. Now cut along the 2" line and the lines that run through the holes you just bored.
Remove the plastic between these holes so that you create "legs" for the fin. These legs will set the correct depth for the fin in the hull. Bore holes Diy Inflatable Boat Launcher Queen Boat Inflatable Queen Launcher Diy Diy Inflatable Boat Launcher Queen every inch or so in the legs, see pictures these will be the only real way that the fin will be anchored in the hull.
Lay out the fins along the center line, you want the stern most one to end where the stern of the boat is two inches across on the bottom. Set Diy Inflatable Boat Launcher Queen
You want to have a fin under the bow, with the forward end just where the foam is two inches across the bottom. This fin will be what hits the ground when you beach Diy Inflatable Boat Launcher Queen Diy Inflatable Boat Launcher Queen Diy Inflatable Boat Launcher Queen your boat, and will help you slide off the beach when launching. Set the legs of the fin on the hull and trace around them skeg video. Using the razor knife cut along the lines, bury the blade all the way into the foam.
You want each leg pocket to be 1" deep into Diy Inflatable Boat Launcher Queen Launcher Diy Queen Boat Inflatable the foam. Test that the fin sits flush with the hull, with the legs fully inserted into the hull. Dig out any foam that blocks them. Dig small pockets off to the side that taper away from the skin, in line with each hole mark.
Do this off to both sides. Using the Diy Inflatable Boat Launcher Queen Diy Inflatable Boat Launcher Queen tip of the adhesive tube, pump PLpremium adhesive into each pocket. Press the cutting board legs all the way into the pockets, use a bondo spatula to remove the excess glue around the edges. As the adhesive cures it swells, this will lock the fin into the hull, and will try to push the Diy Inflatable Boat Launcher Queen Boat Inflatable Launcher Diy Queen fin back out of the holes unless you hold it in until cured. Lay bricks on each end of the fin to keep it fully inserted.
Excess glue will push out around the fins, I use a flush cut saw to cut the glue and then rip it off.
The row of fins reminds me of the plates on the back of a dinosaur, or the "saw blade" nose of a real saw fish. Handles are an important part of securing and carrying your boat around, since the boat is made of foam, the only way to attach anything securely to it is to embed it in Diy Inflatable Boat Launcher Queen Diy Inflatable Boat Launcher Queen the foam with a good glue, just like the skegs in the last step were.
I do the same thing for rope anchors for the bow and right behind the cockpit for towing or gear lashing. Drill vertically into the foam until the bit holder is buried, repeat for the second mark. You might Diy Inflatable Boat Launcher Queen be able to use the phillips screw driver for this also.
Then make sure the strap has enough free length to not trap your knuckes against the hull. I use the same idea to make small loops right behind the cockpit to use as tow points for ropes to other boats, and as gear Diy Inflatable Boat Launcher Queen Diy Inflatable Boat Launcher Queen leash anchors for fishing rods, etc.
I also like to add one to the bow for the bow line for securing to the car. Now that the paint is dry, you still need to add the hatch covers. You want them to be easy to slide in, with just a little friction. Sand Diy Inflatable Boat Launcher Queen Inflatable Diy Queen Boat Launcher Diy Inflatable Boat Launcher Queen Diy Inflatable Boat Launcher Queen Diy Inflatable Boat Launcher Queen Diy Inflatable Boat Launcher Queen or cut away any fabric or foam that interferes. Use the thin edge of the straight blade screw driver to cut a small groove all the way around the hole, about a quarter of an inch from the top skin.
Be sure to have the hatch covers in while the foam is curing. It Diy Inflatable Boat Launcher Queen won't take you long on a kayaking blog or page to find out that most paddlers, find their kayak seats to be uncomfortable.
I agree. I started with just sitting on a square throwable boat cushion, after a while this feels like concrete My rear end gets numb and painfull before too long. I Diy Inflatable Boat Launcher Queen have a folding stadium that has a thin hard foam seat and a fabric back. I guess it beats a hard cement, steel, wood, or aluminum bench, but not by much I bought foam to make what many claim is the nicest foam seat for kayaking ever, however I haven't had Launcher Inflatable Diy Queen Boat Diy Inflatable Boat Launcher Queen time to make the seats yet.
Finally, I tried out what I think is the cheap, easy answer, a stadium seat that actually doesn't hurt my rear. Searching around on the web I discovered it seems to be usually sold under the name " Oniva seat ", I was getting them at a local discount Diy Inflatable Boat Launcher Queen Diy Inflatable Boat Launcher Queen Diy Inflatable Boat Launcher Queen chain, but they no longer carry them. Now I see that some Wallmarts have them. The seat most often recomended on paddling sites is the GCI sitbacker.
The Oniva seat folds flat and has a carry strap, I can also see it being used as a camping seat, and even a cushion for a Diy Inflatable Boat Launcher Queen Diy Inflatable Boat Launcher Queen quick nap in the sun. In my tandem sawfish, Tango, we use beach chairs , which are folding lawn chairs, with really short legs, intended to allow you to sit at the beach with your body out of the sand, but not high enough to be unstable on the sand.
The sand chairs aren'Diy Inflatable Boat Launcher Queen Diy Inflatable Boat Launcher Queen Diy Inflatable Boat Launcher Queen t perfect, they have a seat back angle that is slightly too reclined for putting extra power into the paddling, however for an easy paddle or for fishing they should work just fine.
If you look at the tubes and joints of the seat, it is easy to see that some minor modifications could Diy Inflatable Boat Launcher Queen Diy Inflatable Boat Launcher Queen Diy Inflatable Boat Launcher Queen Diy Inflatable Boat Launcher Queen make the seat have a more vertical back to it. I'll get around to it someday, but until then, I just sit forward a little and paddle, it works for a few hours without any strain. Just be sure that you can fit a sand chair into your cockpit, I can fit the Boat Inflatable Diy Launcher Queen Diy Inflatable Boat Launcher Queen sand chairs just fine in Tango, but the cockpit in Sawfish is too narrow for a sand chair.
My most recent seating experiment isn't finalized yet, but I like it the best. I like it because the seat is clipped to the hull, and the high back gives me the ability to Boat Diy Inflatable Launcher Queen Diy Inflatable Boat Launcher Queen control the tilt of the kayak hull from my hips called edging in kayak lingo, a technique used for steering. Fishing from a kayak has become a very popular activity in the past few years. Just about any kayak can be outfitted for fishing, at a cost that is much less than that of Boat Queen Inflatable Launcher Diy Diy Inflatable Boat Launcher Queen Diy Inflatable Boat Launcher Queen a motorboat and trailer.
Not to mention how much healthier it is to paddle in and out. By widening the hull to 36" in the middle he made his boat wide enough to stand up in. He also added foot pedal steering connected to a trolling motor.
He also made a nice video showing Diy Inflatable Boat Launcher Queen the details of his kayak, and a full build video that explains how he put it all together. NiteWolfFishing has another great video of his Wolfeyak. Rick INSC has built a couple motorized foam fishing kayaks.
Mandrews has also been making a good series of youtube videos of his Sawfish build. I share the link of his test under motor power. Matt fletcher built a short one as well.
I haven't gone fishing since high school, so don't ask me for tips on how to rig your boat, I would recommend that you head on over to Kayak diy projects and tutorials and do some Inflatable Boat Queen Launcher Diy research on the mods most kayak fishermen find useful. From what I see, anchor travelers, power poles, and fish finder mounts are the most popular, and the guys there love the foam kayak idea, so don't be afraid to post up what you are building.
I had a friend ask me for two Boat Launcher Inflatable Diy Queen Boat Launcher Diy Inflatable Queen Boat Launcher Queen Diy Inflatable Sawfish kayaks so he could take his wife fishing. He liked the idea of build in rod holders, and his wife asked me to make the sides a little higher. I started with the basic Sawfish design, but made the aft bulkhead wider to allow rod holders to be embedded in the foam.Diy Inflatable Boat Launcher Queen Diy Inflatable Boat Launcher Queen
Haven't made the sail yet nor the rudder assembly but the mast is up. With any Luck I can see this in the water in a week or 2.
Reply 6 years ago on Introduction. Reply 5 years ago on Introduction. New polytarp sail new rudder and broken rig. Apparently the old PVC Diy Inflatable Boat Launcher Queen didn't bond well at one joint and the weld broke. Reply 7 years ago on Introduction.
I know you mentioned polyurethane to prevent water from going inside, does that hold it together? Maybe I missed this part. I think I will use the same design as you originally I had thought of a Diy Diy Inflatable Boat Launcher Workshop Inflatable Boat Launcher Queen Diy Inflatable Boat Launcher Queen Diy Inflatable Boat Launcher Queen Diy Inflatable Boat Launcher Queen bermuda sail, but I don't have that much material to work with.
After all glued I filled the inside with polyurethane not to get water. I built a sailing rig for one of the cheap as dirt inflatable boats very Diy Boat Launcher Apk similar to this. I used the intex something , which by the way Diy Inflatable Boat Launcher Queen Diy Inflatable Boat Launcher Queen will float 2 adults that weigh around double what its weight limit says on the box.
One of the differences was in that for the leeboards i used two 1. I also used a polytarp sail. I ended up making a smaller sail about 12 sq. These tiny little inflatables have almost no drag in the water and that translates to this rig sailing quite fast for what it is.
It also still moves in low wind conditions. This is a fantastic toy and I'm totally going to make more of these. You know I was designing a sailing rig for my inflatable when I found this.

Random links:
Fiberglass Boat Construction Methods For
Steamboat Near Ayer Keroh
Small Watercraft Rentals Inc
Homemade Duck Boat Blind Plans Design
Bottom Paint For Boats Near Me 90
